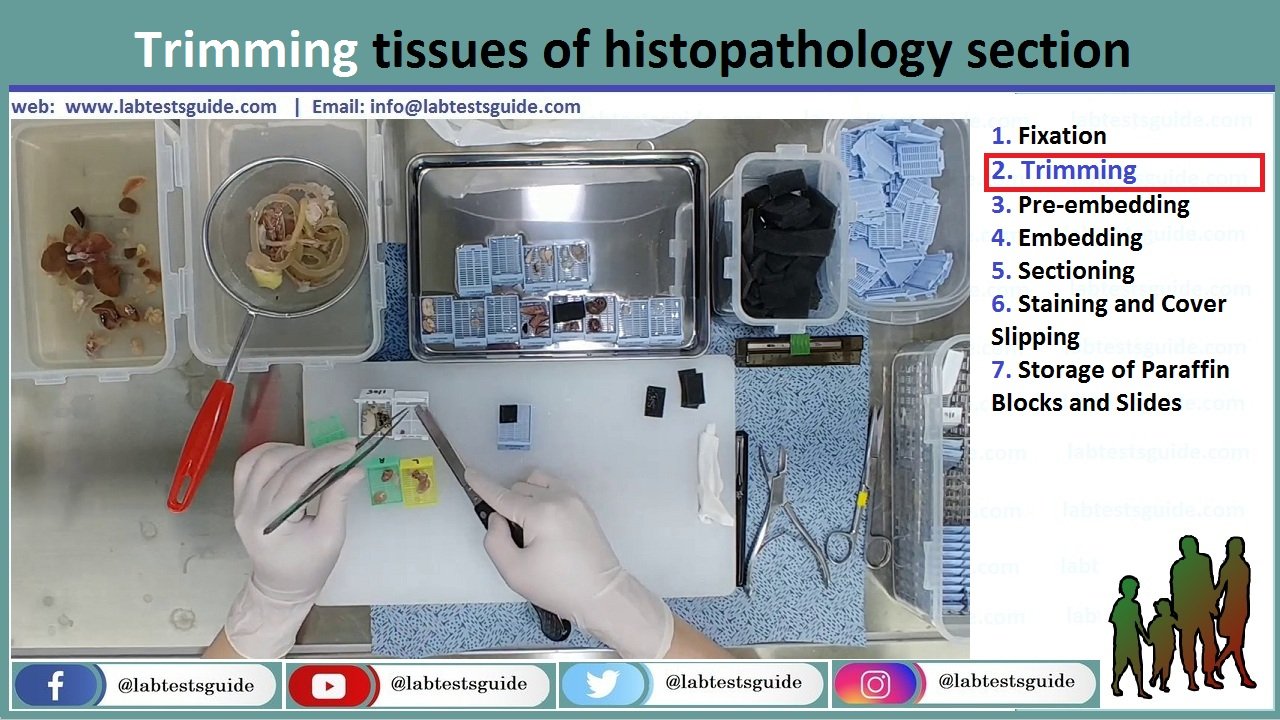
After fixation, tissue samples need to be properly trimmed to reach the adequate size and orientation of the tissue. This step is also important to reach a sample size that is compatible with subsequent histology procedures such as embedding and sectioning.

Hard tissues (such as bones and teeth) must be decalcified before trimming.
- Under a fume hood, remove tissue samples from the fixative container or jar.
- Trim one or more small pieces of tissues and organs and fit them into cassettes.
- Place a lid on the cassette.
- Label each cassette with a permanent ink.
- Store cassettes in a fixative container.
There are specific rules that should be followed for trimming of each tissue and organ. These depend on the goal of the histopathology evaluation. Standardized methods for toxicology studies in drug safety evaluation are available online . These are also described in the comprehensive papers from the RITA group (Registry of Industrial Toxicology Animal data). Specific methods have been proposed for many organs: gut, heart, male reproductive system (12–14), female reproductive system, or muscle.
Materials:
- Fixation:
- Fixative solution (usually commercially available formalin).
- Phosphate buffer (pH = 6.8).
- Rubber or gloves (see Note 1).
- Protective clothing.
- Eyeglasses and mask.
- Fume hood.
- Containers with appropriate lids (volume is commensurate
with sample size. Large neck plastic containers are preferable
and can be reused). - Labels and permanent ink
- Trimming:
- Fume hood.
- Rubber or gloves
- Protective clothing.
- Eyeglasses and mask.
- Dissecting board (plastic boards are preferred as they can be easily cleaned and autoclaved).
- Blunt ended forceps (serrated forceps may damage small animal tissues).
- Scalpels blades and handle.
- Plastic bags and paper towels.
- Containers for histological specimens, cassettes and permanent abels. Containers and cassettes, should be correctly labeled before starting tissue trimming.
- Pre-embedding
- Disposable plastic cassettes for histology (with appropriate
- lids). For small samples, disposable plastic cassettes for histology with subdivision (Microsette®).
- Foam pads (31 × 25 × 3 mm) can be used to immobilize tissue
samples inside the cassettes. - Commercial absolute ethyl alcohol and 96% ethanol solution.
- 90% and 70% ethanol solutions.
- Paraffin solvent/clearing agent: xylene or substitute (e.g.,
Histosol®, Neoclear®). - Paraffin wax for histology, melting point 56–57°C (e.g.,
Paraplast® Tissue Embedding Media). - Automated Tissue Processor (vacuum or carousel type).
- Embedding
- Tissue embedding station (a machine that integrates melted paraffin dispensers, heated and cooled plates).
- Paraffin wax for histology, melting point 56–57°C (e.g. Paraplast® Tissue Embedding Media).
- Histology stainless steel embedding molds. These are available in different sizes (10 × 10 × 5 mm; 15 × 15 × 5 mm; 24 × 24 × 5 mm; 24 × 30 × 5 mm, etc.).
- Small forceps.
- Sectioning:
- Rotary microtome.
- Tissue water bath with a thermometer. Alternatively a thermostatic warm plate can be used.
- Disposable microtome blades (for routine paraffin sections use wedge-shaped blades).
- Sharps container to discard used blades.
- Fine paint brushes to remove paraffin debris.
- Forceps to handle the ribbons of paraffin sections.
- Clean standard 75 × 25 mm microscope glass slides (other dimension microscope glass slides are commercially available).
- Laboratory oven (set at 37°C).
- Coated glass slides (e.g., Superfrost® or Superfrost Plus®). This is especially recommended when slides are used for immunohistochemistry.
- 0.1% gelatin in water (1 g of gelatin in 1 L of distillated water). This should not be used with Superfrost® or Superfrost Plus® slides and should be reserved for immunohistology sections
- Staining and Cover Slipping:
- Harris hematoxylin (commercial solution, ready to use).
- Eosin Y solution.
- Hydrochloric acid 37%.
- Absolute ethanol.
- Ethanol 96%.
- Clearing agent (xylene or substitute e.g. Histosol®, Neoclear®).
- Staining dishes and Coplin jars suitable for staining.
- Permanent mounting medium (e.g. Eukitt®).
- Glass cover slips (25 × 60 mm).
- Filter paper.
- Ethanol solutions:
- Add 12.5 mL of water to 1 L of commercial 96% ethanol to obtain 95% ethanol.
- Add 408 mL of water to 1 L of commercial 96% ethanol to obtain 70% ethanol.
- Storage of Paraffin Blocks and Slides:
- Paraffin blocks storage cabinets.
- Histological slides storage cabinets.
Realted Posts
Keywords: histopathology procedure pdf ,histopathology procedure ppt ,histopathology procedure manual ,histopathology staining procedure ,fish histopathology procedure ,histopathology lab procedures ,histopathology complete procedure ,histopathology slide preparation procedure ,histopathology lab procedure ,histopathology policy and procedure ,procedure for histopathology ,procedure in histopathology ,histopathology laboratory procedure ,procedure of histopathology ,histopathology tissue processing procedure ,routine histopathology procedure ,histopathology staining procedure pdf ,histopathology test procedure
RELATED POSTS
View all

